Winter 2009
Cooking Classes
|
WINTER
2009 COOKING CLASSES
Online,
In-Person, or by Telephone
Harper's Point classes - Call
513-489-6400 Settler's Walk classes - Call
937-748-4540
www.cookswaresonline.com
To
view the full schedule and all of the details, visit our website now
and plan some fun this winter! Limited seating -- Plan early,
then Register!
Upcoming
February Classes: (View Feb, Mar, and Apr classes at our
website).
Sat, Feb 7 - Phyllo and Puff Pastry with Rhonda Clark 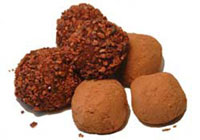
Harper's Point from 11:00am -
1:30pm. $40 - Partial
Hands-On!
Sat, Feb 7 - Love at First Bite - Chocolate Workshop with Beth
Klosterboer
Settlers' Walk from 11:00am -
2:00pm. $60 - Hands-On!
Tue, Feb 10 -
Classic Romantic Valentine
for Two with David and Liz Cook - Class
Full!
Harper's
Point from 6:30 - 9:00pm. $110/couple
Wed, Feb 11 -
Flavor Rich Beef - on a
Budget with  Christopher Weist Christopher Weist
Harper's Point from 6:30 -
9:00pm. $50
Thu, Feb 12 -
A Table for Two - or
More with George Stengl
Settlers' Walk from 6:30 -
9:00pm. $40
 Mon, Feb 16
- Cookin' Cajun and
Creole with Matthew Hayden Mon, Feb 16
- Cookin' Cajun and
Creole with Matthew Hayden
Settlers' Walk from 6:30 -
9:00pm. $40
Tue, Feb 17 -
Wild Bill's All New Cajun
& Creole with Bill Schroeder 
Harper's Point from 6:30 -
9:00pm. $40 - Class
Full!
Wed, Feb 18 -
Warm Welcome Soups with
Marilyn Harris
Harper's
Point from 6:30 - 9:00pm. $65
Wed, Feb 18 -
Artisan Bread Baking
with Matthew Boosalis
Settlers'
Walk from 6:30 - 9:00pm. $35
Sat, Feb 21 -
Classic French Bread
Workshop with Kathy Lehr - TWO
SESSIONS!
Harper's
Point from 10:00am - 1:30pm. $60 - Sold
Out!
Second Session added -
Space Available!
Harper's Point from 2:30pm -
6:00pm. $60 - Hands-On!
Stop
in and have us demonstrate the Beater Blade + for you. You'll
love how it works!
3 Ways to Register: On-Line, In Store,
or by Phone
Harper's
Point classes - Call 513-489-6400
Settlers'
Walk classes - Call 937-748-4540 www.cookswaresonline.com
10%
Discount on merchandise purchases on the day you attend
class!
(excluding kitchen
electrics). |
Mainly
Chocolate
|
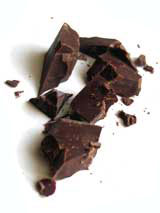
It's the deep,
dark, rich color of chocolate that is surely the origin of the
brownie's diminutive title. The ideal brownie showcases the
chocolate in its best light so that the essential qualities of the
cacao bean are put on display.
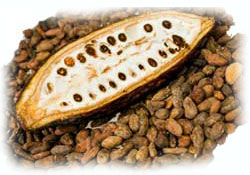 What is Chocolate? - Chocolate is
derived from seeds harvested from the tropical cacao tree. The
seeds are encased in pulpy cacao pods. Each cacao tree
produces about a dozen pods twice a year, or enough for
approximately two pounds of bittersweet chocolate. After cacao
pods are harvested, the seeds and pulp are left to ferment for 3-7
days. The seeds are then extracted, roasted, and ground.
The ground seeds create an emulsification comprised of cocoa butter
(40-50%), cocoa powder (50-60%). What is Chocolate? - Chocolate is
derived from seeds harvested from the tropical cacao tree. The
seeds are encased in pulpy cacao pods. Each cacao tree
produces about a dozen pods twice a year, or enough for
approximately two pounds of bittersweet chocolate. After cacao
pods are harvested, the seeds and pulp are left to ferment for 3-7
days. The seeds are then extracted, roasted, and ground.
The ground seeds create an emulsification comprised of cocoa butter
(40-50%), cocoa powder (50-60%).
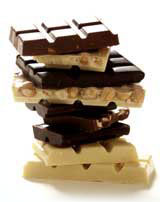 Different Types of
Chocolate - The percentages listed on chocolate
packaging indicate the amount of cacao, (cocoa butter and cocoa
solids), present in the product. The remainder of the
purchased chocolate is comprised of sugar, milk, and vanilla.
These percentages translate into the familiar categories as
follows: Different Types of
Chocolate - The percentages listed on chocolate
packaging indicate the amount of cacao, (cocoa butter and cocoa
solids), present in the product. The remainder of the
purchased chocolate is comprised of sugar, milk, and vanilla.
These percentages translate into the familiar categories as
follows:
Milk chocolate =
30-40% cacao
Semi-sweet chocolate =
55-60% cacao
Bittersweet chocolate
= 65-80% cacao
Unsweetened chocolate
= 99% cacao
(White chocolate has no cocoa
solids, only cocoa butter). The darker the chocolate, the greater
the antioxidant value, and the less sugar and butter there is in the
chocolate. Those of us that like to consider chocolate a
"health food," like to quote the comparison of 1.5 ounces of
bittersweet chocolate contains the same antioxidant value as a 5
ounce glass of red wine.
Use Good Chocolate -- This leads to
the first rule of baking with chocolate, and we'll borrow a phrase
from oenophiles, don't use a chocolate in baking that you wouldn't
eat and enjoy out of hand. Definitely avoid any temptation to
use "chocolate-like morsels" in your baking; you'll be disappointed
in the results.
Melting
Chocolate - The principal secret in working with chocolate is
remembering that its melting point is about 95 degrees F.
Different cacao percentages and various brands may vary slightly,
but generally fall into the mid-90's. Chocolate rarely needs to be
heated above its melting point in order to be used in baking and
will easily scorch or burn at higher temperatures. The various
methods for melting chocolate fall into three basic
categories:
Indirect
Melting - Chocolate may be melted above hot water by placing
a metal bowl in a hot water bath, or through the use of a double
boiler. The hot water buffers the chocolate from the heat
source decreasing the chances of the chocolate becoming too
hot. This method is recommended when using the chocolate for
covering or dipping. 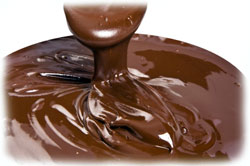 The water bath provides a more
consistent temperature environment while working with the
chocolate. Direct Melting
- With some very close attention and very low heat, chocolate
destined for a batter may be melted directly in a saucepan.
This method works best when melting butter or heating cream along
with the chocolate. Begin by heating the butter or cream and
add chocolate pieces gradually. Remove from heat prior to the
complete melting of the chocolate and always stir continuously.
Microwave
Melting - Again, employing some diligence, chocolate may be
melted in a microwave. Use short bursts of 20-30 seconds on
low-medium power. Allow the chocolate to sit after each burst.
The chocolate will retain its shape even though it may be melted, so
check and stir after each interval.
Water and Melted Chocolate Don't
Mix! - Chocolate is a suspension of solid particles in cocoa
butter. When melted, the crystalline structures of chocolate are in
flux. If even a drop of water, or a whiff of condensed steam lands
in the melted chocolate, the solid particles absorb the  liquid and become inspired to glom onto
each other in an aberrant crystallized form. This is known as
"seizing" and instantly turns beautifully melted chocolate into a
stiff, grainy mass. There is no recovery from this situation
other than to start over with fresh
chocolate. liquid and become inspired to glom onto
each other in an aberrant crystallized form. This is known as
"seizing" and instantly turns beautifully melted chocolate into a
stiff, grainy mass. There is no recovery from this situation
other than to start over with fresh
chocolate.
|
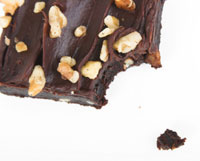
Brownie Tricks and
Techniques
|
 Whether your preference is for a cakey brownie
or a fudgy brownie, the techniques for mixing up a batch of great
brownies is so easy and infinitely tastier, you'll never be tempted
by a box mix again! Whether your preference is for a cakey brownie
or a fudgy brownie, the techniques for mixing up a batch of great
brownies is so easy and infinitely tastier, you'll never be tempted
by a box mix again!
Brownies are made from a combination of
chocolate, butter, sugar, eggs, flour, and flavoring, most often
vanilla. From this base of ingredients the proportions and
variations will determine the brownie's character and flair.
These tips will assist you achieving great results with every
batch:
- Cool any melted butter or chocolate prior to adding any eggs
to the mixture. This will prevent the eggs from cooking in
the chocolate's heat. By melting butter and chocolate at the
lowest possible temperature, cooling time will be minimal.
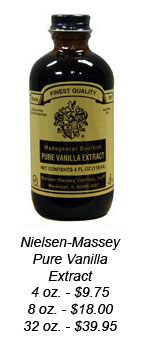 Use pure vanilla extract, never imitation
vanilla. Pure vanilla extract costs more, but this is truly
a case of "you get what you pay for." Since such small
amounts of vanilla are used in any given recipe, a good bottle of
pure vanilla extract will stretch over many, many batches of
brownies and baked goods. We recommend and carry
Nielsen-Massey pure extracts. Their vanilla extract is made
from Madagascar orchids and is sublime in aroma and flavor. Use pure vanilla extract, never imitation
vanilla. Pure vanilla extract costs more, but this is truly
a case of "you get what you pay for." Since such small
amounts of vanilla are used in any given recipe, a good bottle of
pure vanilla extract will stretch over many, many batches of
brownies and baked goods. We recommend and carry
Nielsen-Massey pure extracts. Their vanilla extract is made
from Madagascar orchids and is sublime in aroma and flavor.
- For a more cake-like brownie, use an extra egg. This
will provide extra loft to the batter and to the baked
product. Some brownie recipes accentuate an airy height even
more by beating the egg whites separately and folding them
carefully into the final batter.
- Recipes that use baking powder will produce a more cake-like
brownie. The baking powder acts to produce air bubbles when
wet, and if a "double-acting" baking powder, again when heated. Be
cautious, too much baking powder will upset the pH (acidity)
balance of your brownies. Since baking powder counteracts
the slight acidity naturally present in chocolate, too much will
dampen the chocolate's intensity and potentially result in a
bitter taste. Keep baking powder to less than 1/2 teaspoon
for a 9"x9" pan.
- The flour used in your brownies will also affect the end
result. If using an all-purpose flour, mix the batter as
little as possible after adding the flour. This will keep
the flour's gluten from forming and stiffening the brownie.
Alternatively, use a soft wheat flour such as cake flour or pastry
flour; these flours naturally have less gluten.
- Use a new Beater Blade + to efficiently scrape batter from the
sides of the bowl on your stand mixer. The Beater Blade +
has revolutionized baking efficiency by eliminat
 ing starting and stopping for bowl scrape
downs; an even batter is easily achieved every time. ing starting and stopping for bowl scrape
downs; an even batter is easily achieved every time.
- With or without nuts is a point of passion among brownie
lovers! If you opt in for nuts in your brownies, take the
extra step of toasting the nuts prior to adding them to the
brownie batter. You'll be rewarded with whole new layers of
taste. To toast nuts, heat them in a dry skillet on the
stovetop, or on a baking sheet in a medium-hot oven (375 F).
Toast until the edges of the nuts are just golden. If you'd
like to avoid soggy nuts, reserve the nuts for sprinkling on top
of the brownie batter.
- Improvise with your brownie recipe to create your own
signature brand: vary the type of nuts, add chocolate chunks, lace
in your favorite liqueur as an alternative flavoring, or add dried
fruit.
- The full brownie experience is complete when served with a
cold glass of milk or a great cup of
coffee.
|
Baking Brownies
|
If you've ever
been frustrated with brownies that have brick-hard edges and gooey
centers, the solution may lie not only with the brownie batter, but
how they are baked.
Oven
Temperature - Most brownies respond well to baking in a slow
to medium oven, 300 - 350 degrees F. Check your oven's
temperature with an oven thermometer to ensure that it is calibrated
correctly.
 Position of the Oven Racks -
Brownies will bake best when placed in the middle of the oven.
If the oven rack is placed too low, the bottom may burn; too high
and efficient circulation may be impeded. If your oven has hot
spots, rotate pans during baking. Position of the Oven Racks -
Brownies will bake best when placed in the middle of the oven.
If the oven rack is placed too low, the bottom may burn; too high
and efficient circulation may be impeded. If your oven has hot
spots, rotate pans during baking.
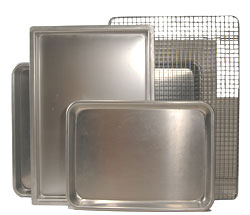
Classic Baking Pans - A good
kitchen has a few classic baking pans available that will due your
brownies justice:
Square Pans: 8"
x 8" or 9" x 9"
Rectangular Pans: 9" x 13"
Full Sheet Pan: 18" x 26"
Half Sheet Pan: 18" x 13"
Quarter Sheet Pan: 13" x 9"
Choose sturdy
bakeware that will not warp in the heat of the oven and that will
stand up to many uses. Metal pans will conduct heat quickly
and efficiently. If baking with glass pans, reduce the oven
temperature by 25 degrees. Silicone baking pans have revolutionized
baking with their naturally non-stick surfaces. Their pliable
nature makes removing baked goods from the pan foolproof. Place
silicone bakeware on a cookie sheet for safe transfers in and out of
the oven.
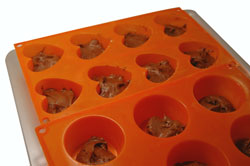
Specialty Baking
Pans - The kitchen world is full of unique, decorative pans
in all kinds of shapes, sizes and decoration. Many of them
provide a unique twist when making brownies. Try brownies in
muffin tins, large or small. Springform pans or other removable
bottom pans are perfect for brownies; they eliminate the difficulty
of lifting cut brownies.
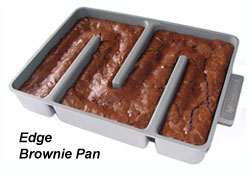
The
Edge Pan - If you enjoy the edge pieces of brownies, there's
a pan made just for you, the Baker's Edge Nonstick Edge Brownie
pan. The unique design provides two edges on each
brownie. If you shy away from edge pieces, the inventor of
this pan says it's because you've never had a good edge. Most
brownies are baked too long and have dried out edges. This pan
solves that problem and will turn you into an "edge
lover."
Cooling Racks
- A good cooling rack is necessary for all kinds of baking.
Once a baked good is removed from the oven, it is important to stop
the baking process by exposing the pan to room temperature air and
allowing the cooler temperatures to circulate around the bottom of
the pan. We especially like cooling racks that fit neatly
inside a corresponding baking pan; this feature is handy when
frosting or glazing cookies, bars, or petit fours. You'll find that
a grid-style cooling rack works better than a rack with wires in
just one direction.
 Match the Pan
with your Recipe - Good brownie recipes will note what size
of pan to use. Match your choice with what's specified in the
recipe. If you need to adjust your pan to something different,
adjust the oven's temperature and the baking time. If you
choose a pan that causes the batter to be shallower, i.e., a larger
pan than what is called for in the recipe, increase the temperature
slightly and decrease the baking time. If the batter in the
pan is deeper, i.e., a smaller pan than what the recipe calls for,
decrease the temperature slightly and increase the baking
time. Match the Pan
with your Recipe - Good brownie recipes will note what size
of pan to use. Match your choice with what's specified in the
recipe. If you need to adjust your pan to something different,
adjust the oven's temperature and the baking time. If you
choose a pan that causes the batter to be shallower, i.e., a larger
pan than what is called for in the recipe, increase the temperature
slightly and decrease the baking time. If the batter in the
pan is deeper, i.e., a smaller pan than what the recipe calls for,
decrease the temperature slightly and increase the baking
time.
|
Smart
Brownie Tips
|
 Tip #1: Use chopped
pieces of chocolate when melting. Large chunks will melt
unevenly and be at risk for scorching. Chocolate chips are
perfect shapes for melting but for shape retention reasons may have
less cocoa butter than baking chocolate. For chopping a block
of chocolate into melting pieces, use a sturdy chef's knife and a
cutting board. Tip #1: Use chopped
pieces of chocolate when melting. Large chunks will melt
unevenly and be at risk for scorching. Chocolate chips are
perfect shapes for melting but for shape retention reasons may have
less cocoa butter than baking chocolate. For chopping a block
of chocolate into melting pieces, use a sturdy chef's knife and a
cutting board.
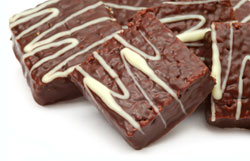
Tip
#2: Create a stunning visual presentation with unique
toppings on your brownies. Stencil brownies with a dusting of
powdered sugar. Sprinkle cacao nibs on top of the batter. Glaze
baked brownies with melted apricot, strawberry, or raspberry jam.
Drizzle melted caramel or white chocolate across finished
brownies.
 Tip #3: Try a highly secret
ingredient that is reminiscent of Aztec chocolate traditions; add a
1/4 teaspoon of cayenne pepper in a recipe sized for a 9"x9"
pan. You won't necessarily notice the pepper, but you'll
notice a difference! Tip #3: Try a highly secret
ingredient that is reminiscent of Aztec chocolate traditions; add a
1/4 teaspoon of cayenne pepper in a recipe sized for a 9"x9"
pan. You won't necessarily notice the pepper, but you'll
notice a difference!
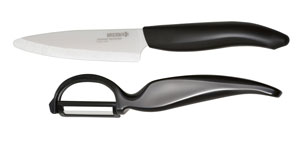
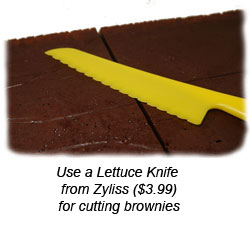
Tip
#4: Use a lettuce knife to cut your brownies. The
plastic knife with its serrated edge slices a pan of brownies
perfectly while minimizing any damage to your baking
pan.
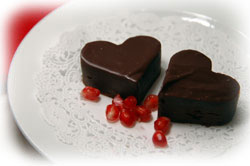
Tip #5: Use
cookie cutters to cut special shapes from baked brownies.
Allow the brownies to cool slightly, but not completely for best
cutting results. |
Q & A
|
  Q: How can you tell when
brownies are done baking? Q: How can you tell when
brownies are done baking?
A: Too little baking
and the brownies are too gooey; too much baking and they become too
hard. Just right, and they're a piece of heaven. Brownie
expert, Chef Bev Shaffer, (see below), recommends testing for
brownie doneness by inserting a toothpick or cake tester 1-2" from
the edge of the pan, not in the center. She looks for a few
moist crumbs on the toothpick to determine doneness.
Q: What is the
difference between Dutch-processed Cocoa Powder and Unsweetened
Cocoa Powder?
A: Cocoa powder, the solid
particles that remain after the cocoa butter is pressed from the
ground cacao seeds, is slightly acidic in nature and is known as
Unsweetened Cocoa Powder. Dutch-processed Cocoa Powder has
been treated with an alkali to neutralize the natural acidity.
Dutch-processed Cocoa Powder is best used in recipes that use baking
powder and require a delicate chocolate flavor. Unsweetened
Cocoa Powder has an intense flavor and may be used in recipes that
have baking soda as the leavening agent.
Q: What is the greasy residue on my
baking pans that I can't seem to remove?
A: This condition is most
likely the result of using nonstick sprays. While nonstick
sprays are effective in keeping foods from sticking, the components
can build up and discolor pans. We recommend using pure oils
in a mister or dabbed on with a brush. Pure oils will clean up
easily keeping your pans in great shape without any unsightly,
sticky residue.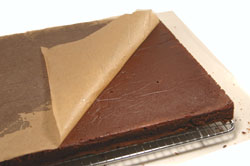
Q: How can I keep the brownies from
sticking to my pan?
A: Line your brownie pan with
parchment paper or aluminum foil to eliminate any sticking and to
create a smooth surface for easy frosting when inverted.
Despite the nonstick nature of both parchment and foil, you'll find
most pastry chefs recommending greasing the pan prior to lining and
also greasing the lining after placing in the
pan. |
Cookbook
Review
|
 Brownies to die for! by Bev
Shaffer. Published by Pelican Publishing Company, Inc.,
Gretna, LA. Copyright 2006. Brownies to die for! by Bev
Shaffer. Published by Pelican Publishing Company, Inc.,
Gretna, LA. Copyright 2006.
The only thing more decadent than
a pan of freshly baked brownies is an entire cookbook devoted to
brownies! Chef Bev Shaffer applies her indomitable enthusiasm
to every possible aspect of brownie-making. The book contains
over 100 brownie recipes that are generously illustrated with
voluptuous close-up photography that will make your mouth
water. From basic to quite complex, the brownies are detailed
in easy-to-follow instructions that enable the novice and expert
baker alike. Luscious titles easily inspire the reader into
becoming a baker - Apricot Brownie Cheesecake Supremes, Mint
Buttercream Brownies, Rocky Road Frosted Brownies, and even
Stress-Free Brownies. The book concludes with a few suggestions for
some complimentary brownie partners - ice cream, sauces, white
chocolate versions, and brownie serving suggestions. If you
have aspirations to be a brownie expert yourself, this book will
prepare you well! |
Brownie Recipes
|
Recipes excerpted from Brownies to
die for! by Bev Shaffer. Published by Pelican
Publishing Company, Inc. Copyright 2006. Reprinted with
permission from the publisher. All rights
reserved.
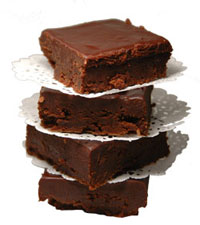
Chocolate-Ganache-Topped
Brownies
 This recipe is perfect for
making a large, crowd-sized batch in one swoop. This brownie
was a slightly cakey, mostly chewy, brownie that epitomized all that
a brownie should be! With or without the ganache topping, the
brownies cut neatly and accommodated some cookie cutter fun.
The slow oven kindly cooked the batter in a gentle manner yielding
an evenly cooked result throughout the pan, no hard edges or gooey
centers. The simple ganache topping made each bite a delightful
mouth experience. This recipe is perfect for
making a large, crowd-sized batch in one swoop. This brownie
was a slightly cakey, mostly chewy, brownie that epitomized all that
a brownie should be! With or without the ganache topping, the
brownies cut neatly and accommodated some cookie cutter fun.
The slow oven kindly cooked the batter in a gentle manner yielding
an evenly cooked result throughout the pan, no hard edges or gooey
centers. The simple ganache topping made each bite a delightful
mouth experience.
Click here to view the
recipe.
Click here for a printable version of
the recipe.
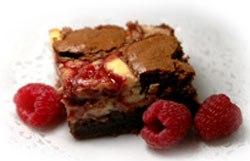 Raspberry Marbled
Brownies Raspberry Marbled
Brownies
Dressed up and ready to go, the
addition of a cheesecake-like batter and seedless raspberry jam made
these brownies colorful and added a bit of sparkle to their
presentation. The fresh raspberry flavor juxtaposed with the
cheesecake filling on the brownie base was a sublime
experience. Chef Shaffer recommends trying other fruit
flavors, and we fully intend to follow her advice.
Click here to view the
recipe.
Click here for a printable version of
the recipe.
My Favorite
Cappuccino Brownies
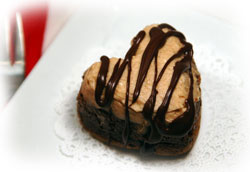 Chocolate and coffee - both beans, both
tropical, both addictive, and both compliment the other in this
delightful brownie variation. The balance of cinnamon in the
cream cheese-based frosting was perfect, just like a perfect
cappuccino! We baked this recipe in muffin tins (ok, silicone
pans), and baked them for slightly fewer minutes than the pan
version may have required. We were rewarded with ready, individual
shapes that had a natural dip in the center providing the perfect
well for holding a generous amount of frosting. Some we
drizzled with the chocolate ganache, others we covered completely
for a totally decadent "petit four-style" brownie. Chocolate and coffee - both beans, both
tropical, both addictive, and both compliment the other in this
delightful brownie variation. The balance of cinnamon in the
cream cheese-based frosting was perfect, just like a perfect
cappuccino! We baked this recipe in muffin tins (ok, silicone
pans), and baked them for slightly fewer minutes than the pan
version may have required. We were rewarded with ready, individual
shapes that had a natural dip in the center providing the perfect
well for holding a generous amount of frosting. Some we
drizzled with the chocolate ganache, others we covered completely
for a totally decadent "petit four-style" brownie.
Click here to view the
recipe.
Click here for a printable version of
the recipe.
| |


 In fact, should you meet someone that
doesn't appreciate a good brownie at some level, be
suspicious! Ask them if they've ever had a brownie made
from scratch, not from a box. There are a few tricks to
making good brownies and we're ready to share what we know so
that your brownies become the best brownies around!
We'll offer some advice on working with chocolate in the
kitchen, share some specific tips for brownie-making, and clue
you in about some key brownie-baking tools. We finish
with three recipes for scrumptious brownies that will be
perfect for Valentine's Day . . . or
anytime!
In fact, should you meet someone that
doesn't appreciate a good brownie at some level, be
suspicious! Ask them if they've ever had a brownie made
from scratch, not from a box. There are a few tricks to
making good brownies and we're ready to share what we know so
that your brownies become the best brownies around!
We'll offer some advice on working with chocolate in the
kitchen, share some specific tips for brownie-making, and clue
you in about some key brownie-baking tools. We finish
with three recipes for scrumptious brownies that will be
perfect for Valentine's Day . . . or
anytime!